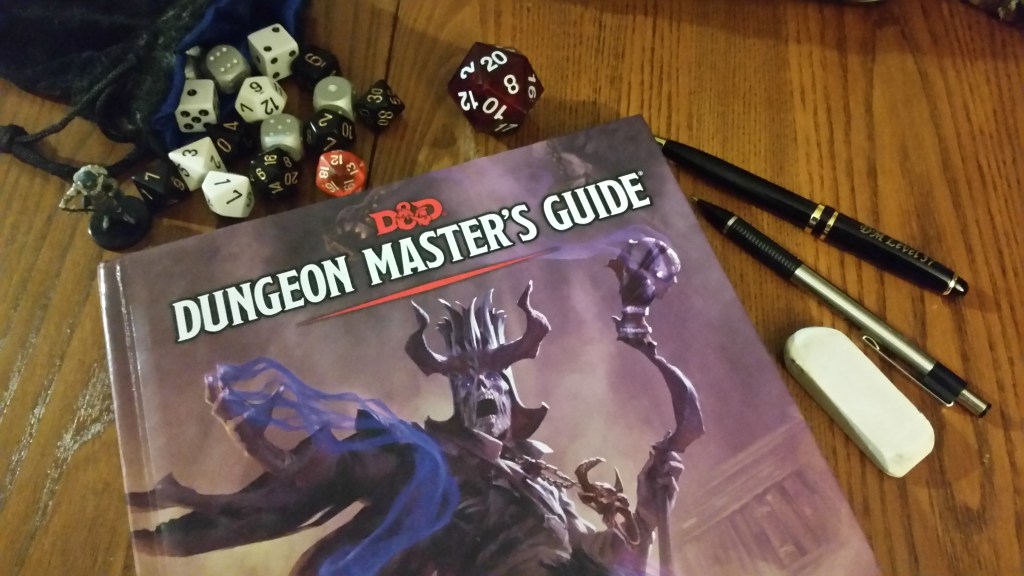
The Dungeon Master Guide (DMG) has a lot more to offer than just an introduction to the role itself. An experienced game master will find many treasures in the book worth their time and inspiration, and not just the enormous lists of items!
The scope of this book is enormous, so it might be difficult to tell if it is worth your time, or if you have missed something. To help with that, I’d like to offer a guide to highlight parts of the DMG and how it can both introduce the role of the DM and save experienced DM a lot of time. Additionally, there is plenty of reason that a player would find a lot of use from this book to.
Encounter Formula (p. 82-84)
This section is easily my most referenced chart in this entire book. One of the most difficult parts of game design is determining what is just the right challenge for the party. You don’t want to kill the party, but you also don’t want the party to go unscathed. Thankfully, Wizards of the Coast have helped us out by giving a useful chart and formula to assess what will be an easy or deadly encounter for your party. There is also some math in place to help gauge how many of these encounters the party can handle in a day (or long rest).
Any encounter design can be easily started by assessing the adventuring day xp, with respect to the number of players and their level, which will give you a total to aim for. Don’t forget NPCs! You can then determine what would count as a deadly encounter for your party and find creatures that would fill the role. From there, you will have a palette of monsters to fill your happy little encounter with happy little friends.
When using these calculations in your game, try to gauge just how challenging the encounter is to the players. A group of gamers who min/max the statistics of the game are going to see a deadly encounter much differently than a group of first-timers who are learning the game. Some where in between is where your group is, and your job is to find that sweet spot for challenging your group.
It is an on-going process to judge this and tweak the formula to your group and design. Although a formula, it is by all rights just a starting point, to be refined by your specific group.
Treasures (p. 133-232)
This is the major appeal of the book, and it can be easy to get lost in the creative items of all sorts. There are charts at the beginning of the section to help guide you on what to give for the two major looting scenarios that always happen: looting an individual, or looting the hoard! They are also broken down by character level to help balance with the enemies abilities.
After doing the encounter formula above, you can use the treasures from the hoard chart to populate your scenario. These treasures can complement the monsters, either by being their weapon of choice, an active item that they are protecting, the reward for disarming a trap, or to be used as an improvised treasure.
It is not just medieval high fantasy items that you can find, there is alien technology also included in this book! If you’re looking to include laser rifles, grenades, or any modern weaponry, you can find them at page 268. Additionally, your castle scenario might need some siege equipment that isn’t included in any of the other books. You can find them on page 255.
Dungeon Creator (p. 99 & 290)
From the above, you might have all you need to start your own scenario. If you find yourself struggling for inspiration or suddenly needing to improvise a dungeon, the book offers the means to randomly create a dungeon, populate it with monsters, traps, and decorations. You might find the tricks and traps tables the most inspiring, as they could easily be transferred to any scenario.
Traps (p. 121)
If you’re just starting out, you might wonder how to best assess the difficulty and threat that a trap should have. This book will help give you three varying strengths of challenge, adapting to the levels of the players. There are some example traps included that are pretty common, like the pit trap.
Tables!
This book is full of tables. So many tables. There is a section dedicated to randomly generating villains, settlements, cities, organizations, combat encounters, adventure arcs, worlds, crafting, and random encounters for any sort of setting. They are littered throughout the entire book, but I think the most useful ones I have found were:
- Magic crafting costs p. 129
- Selling magic items p. 130
- Tavern Names p. 113
- Stronghold Building and Maintenance Costs
p. 127-128
Subclasses – Cleric and Paladin (p. 96-97)
There are two subclasses included as examples of how to customize a class. They could very well be considered viable options for your villain, but also the players! Consider the Oathbreaker Paladin or Death Cleric on pages 96 and 97. They are great examples of how you can find ways to create your own rules for the game, to offer new choices for subclasses, while also offering an unexpected villain for the players who might be too familiar with the core classes.
Customizing Monsters, Races, and Spells (p. 274-275)
While the two subclasses are great options for the customized classes, there are many means to make your own choice for quite literally anything in the game. The book outlines this well, but I find the most useful chart is on page 274 and 275 which can help you determine the challenge rating and experience for the encounter budget. The charts outline what to expect for AC, HP, average damage output, etc. for each challenge rating. You can also use this section to help determine the challenge of enemy NPCs with levels in a class!
Monster Appendixes
While there are many onlines sources and pdfs available with updated lists of monsters by experience or challenge rating (https://media.wizards.com/2014/downloads/dnd/MM_MonstersCR.pdf), the DMG offers the details of the monsters included in the monster manual. From this, you can easily find the creatures that fall within the encounter math you did before, and being to see what can fill your scenario. You might even find the inspiration for your scenario in this list, and it can intuitively begin telling it’s own story.
World Building & Lore
The DMG uses the Forgotten Realms campaign setting to walk you through how to create your own world. If you’re an experienced game master, this may not be the selling point for you if you plan to create your own world. If you’re looking to learn about the Forgotten Realms setting, or how to create your own, then this is a fantastic guide. Considering that the majority of the campaign modules are set in this world, it could be worth your time to familiarize yourself with how the world operates.
The world building covers a large scope, spanning simple settlement design, to planar dimensions and how they interact. You do not need to read all of them as it is likely that they will not all be relevant to your game, but they are their if you need to, and use the Forgotten Realms setting to help give examples.
Inspiration
The content in this book is enormous, which is rightfully so as the role of the DM is to offer a world and to integrate the players ideas into it. This is only a sample of what it can offer, and I’m sure I’ve overlooked something. Whenever I am looking for ideas because I’m stuck on how to continue, I know I can look through the DMG and find a chart I haven’t seen before or forgotten. There might be an item that perfectly fits the inventory of an NPC, or a boon that the God wants to reward the players with. If the DMG doesn’t give you an answer, it can definitely point in the right direction.
Did I miss something crucial? Is there a chart that you find especially useful? A magic item that cannot be overlooked (like the Ring of the Ram?!)? Let me know!


Leave a comment